




Curtain and Roman Shade Measurement Guide
How to Measure Curtains and Roman Shades
Accurate measurements support a well-proportioned fit and reliable operation.
This guide covers Roman shades and custom curtains.
Because bracket dimensions, operating systems, header styles, factory deductions, and production tolerances vary by product,
always compare these general steps with the specifications and options shown on the product page before ordering.
If a measurement or order field is unclear, contact info@usdrapery.com before submitting the order.
Two Primary Mounting Options:
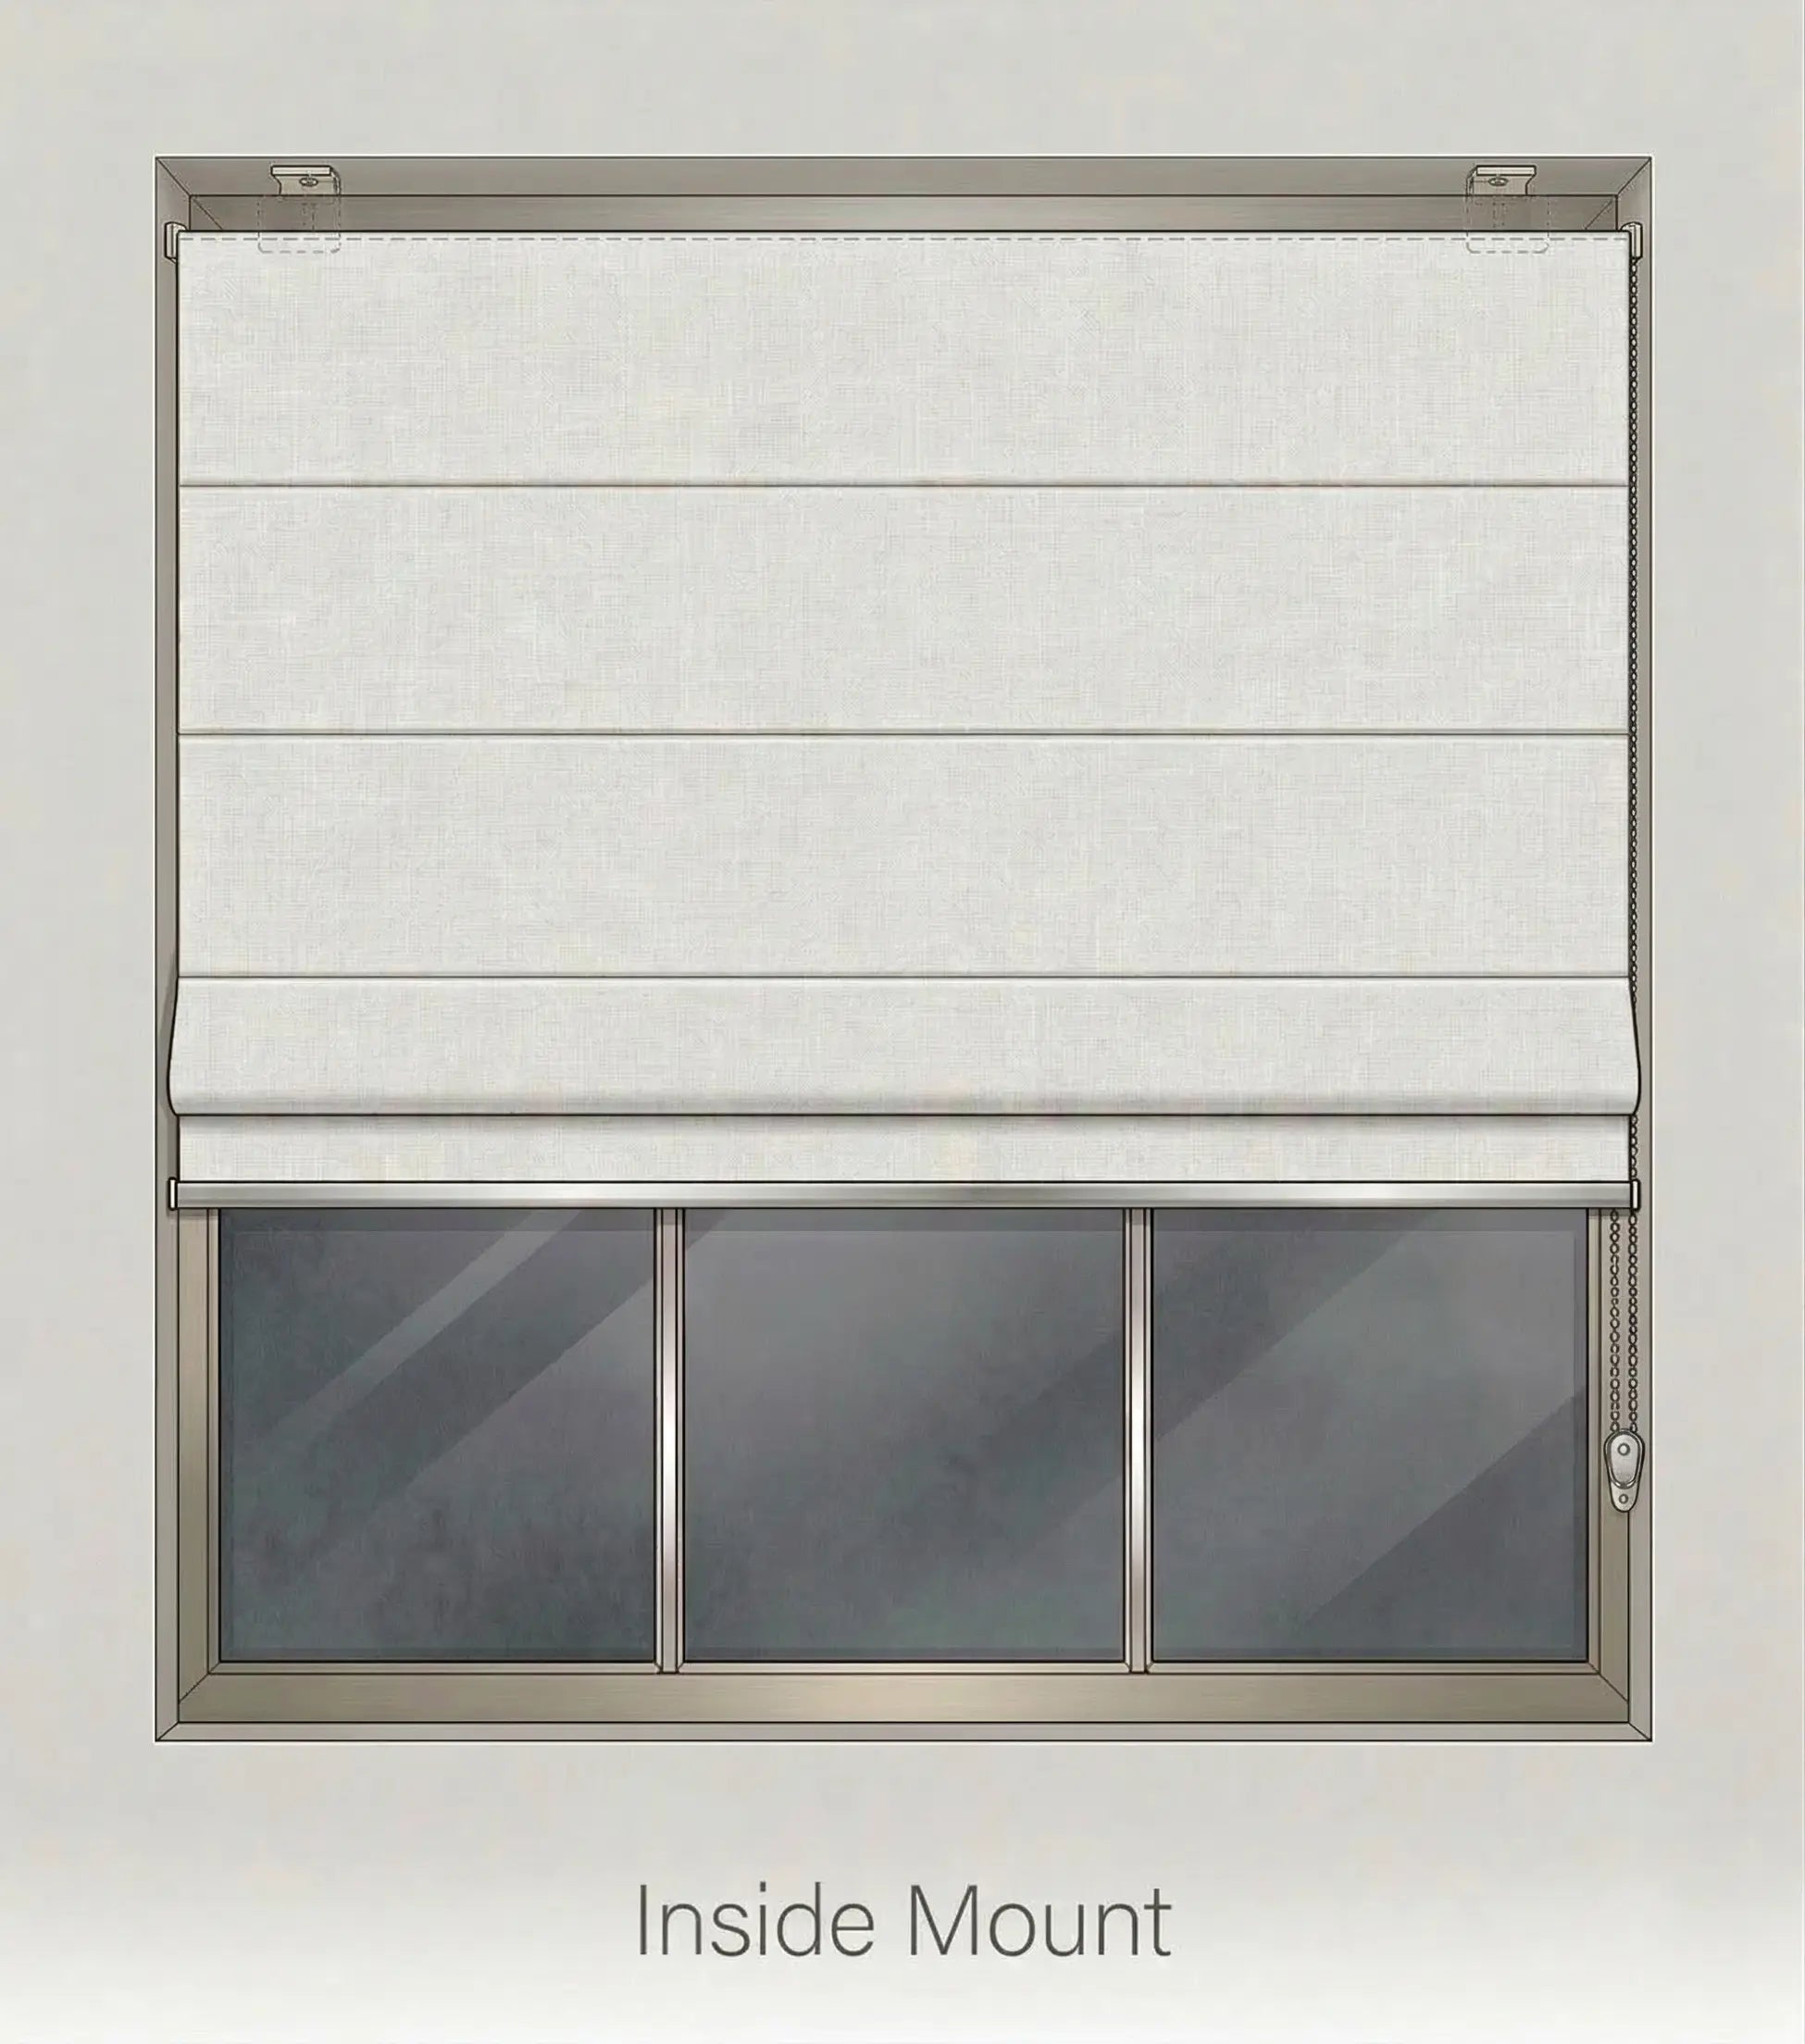
Inside Mount (Figure 1)
Installed within the window opening for a clean, integrated appearance that keeps the trim visible. Measure the available depth and any obstructions, then compare them with the minimum and flush-mount depth listed for the selected product and operating system. Do not assume one depth requirement applies to every Roman shade.
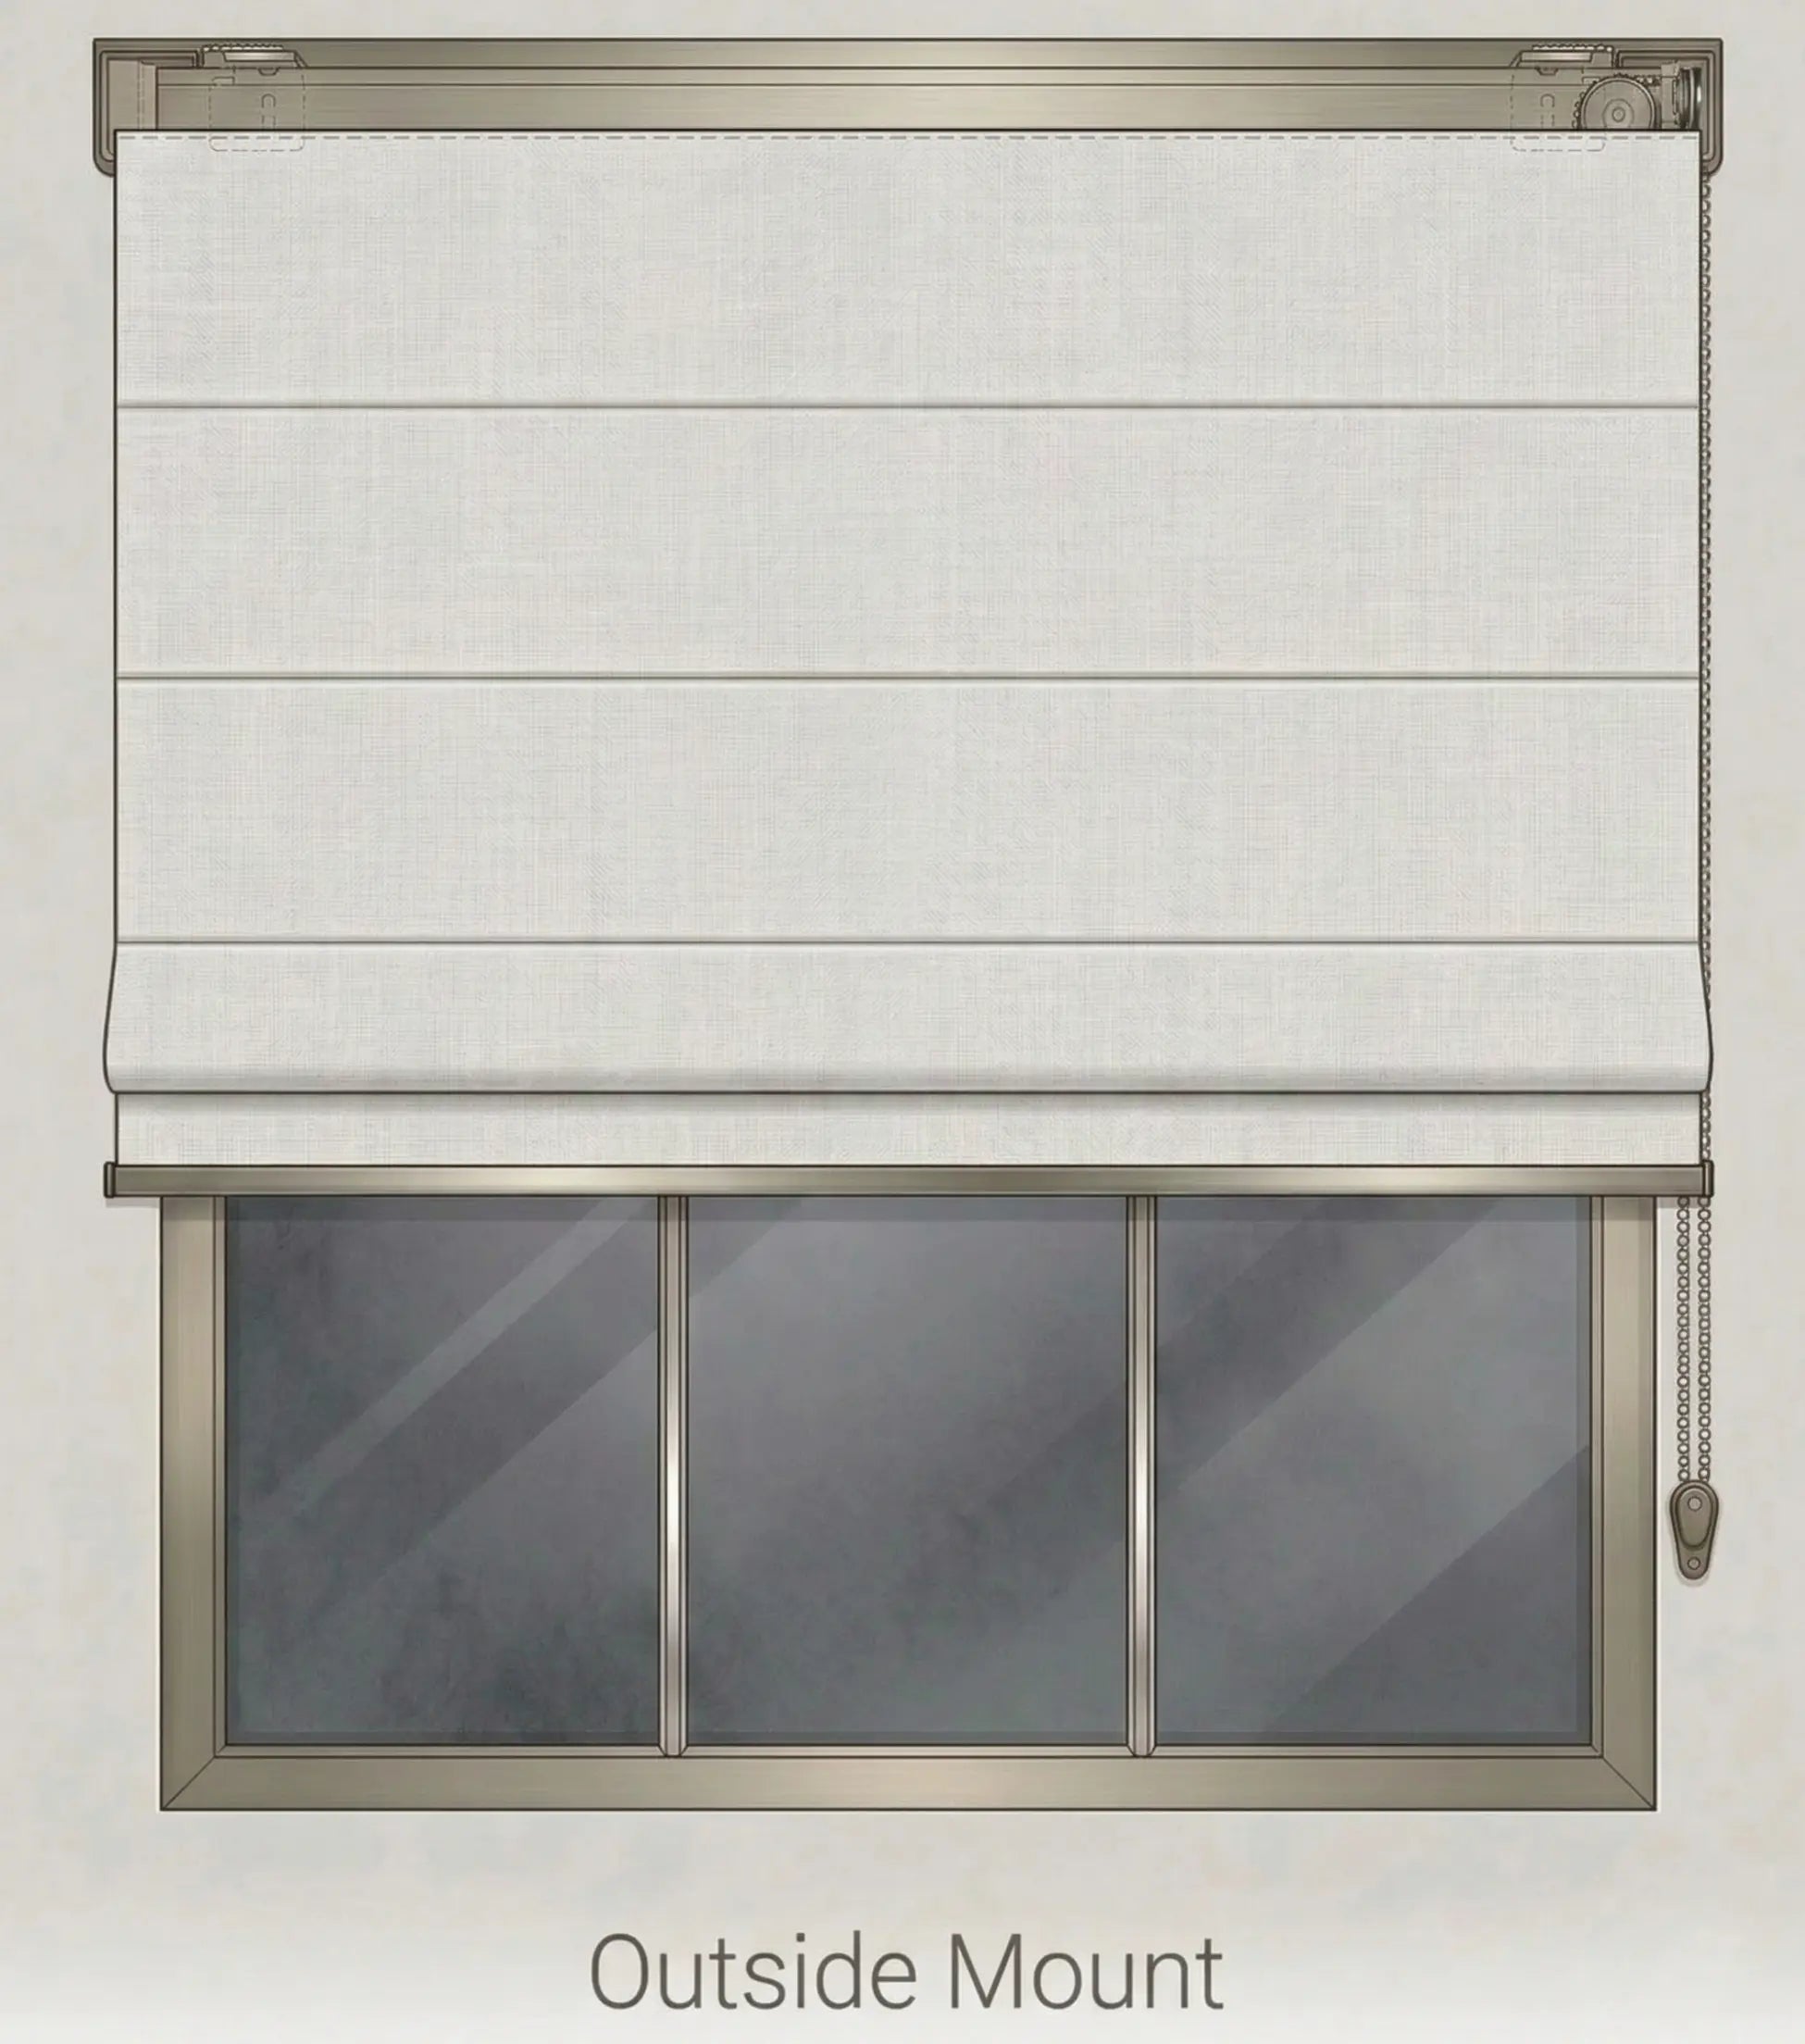
Outside Mount (Figure 2)
Installed on the wall or trim outside the window opening. This option can suit windows with limited inside-mount depth and can provide additional coverage, but it requires a flat, secure mounting surface and adequate clearance for brackets, trim, handles, and the raised shade.
Measuring for Different Mount Types:
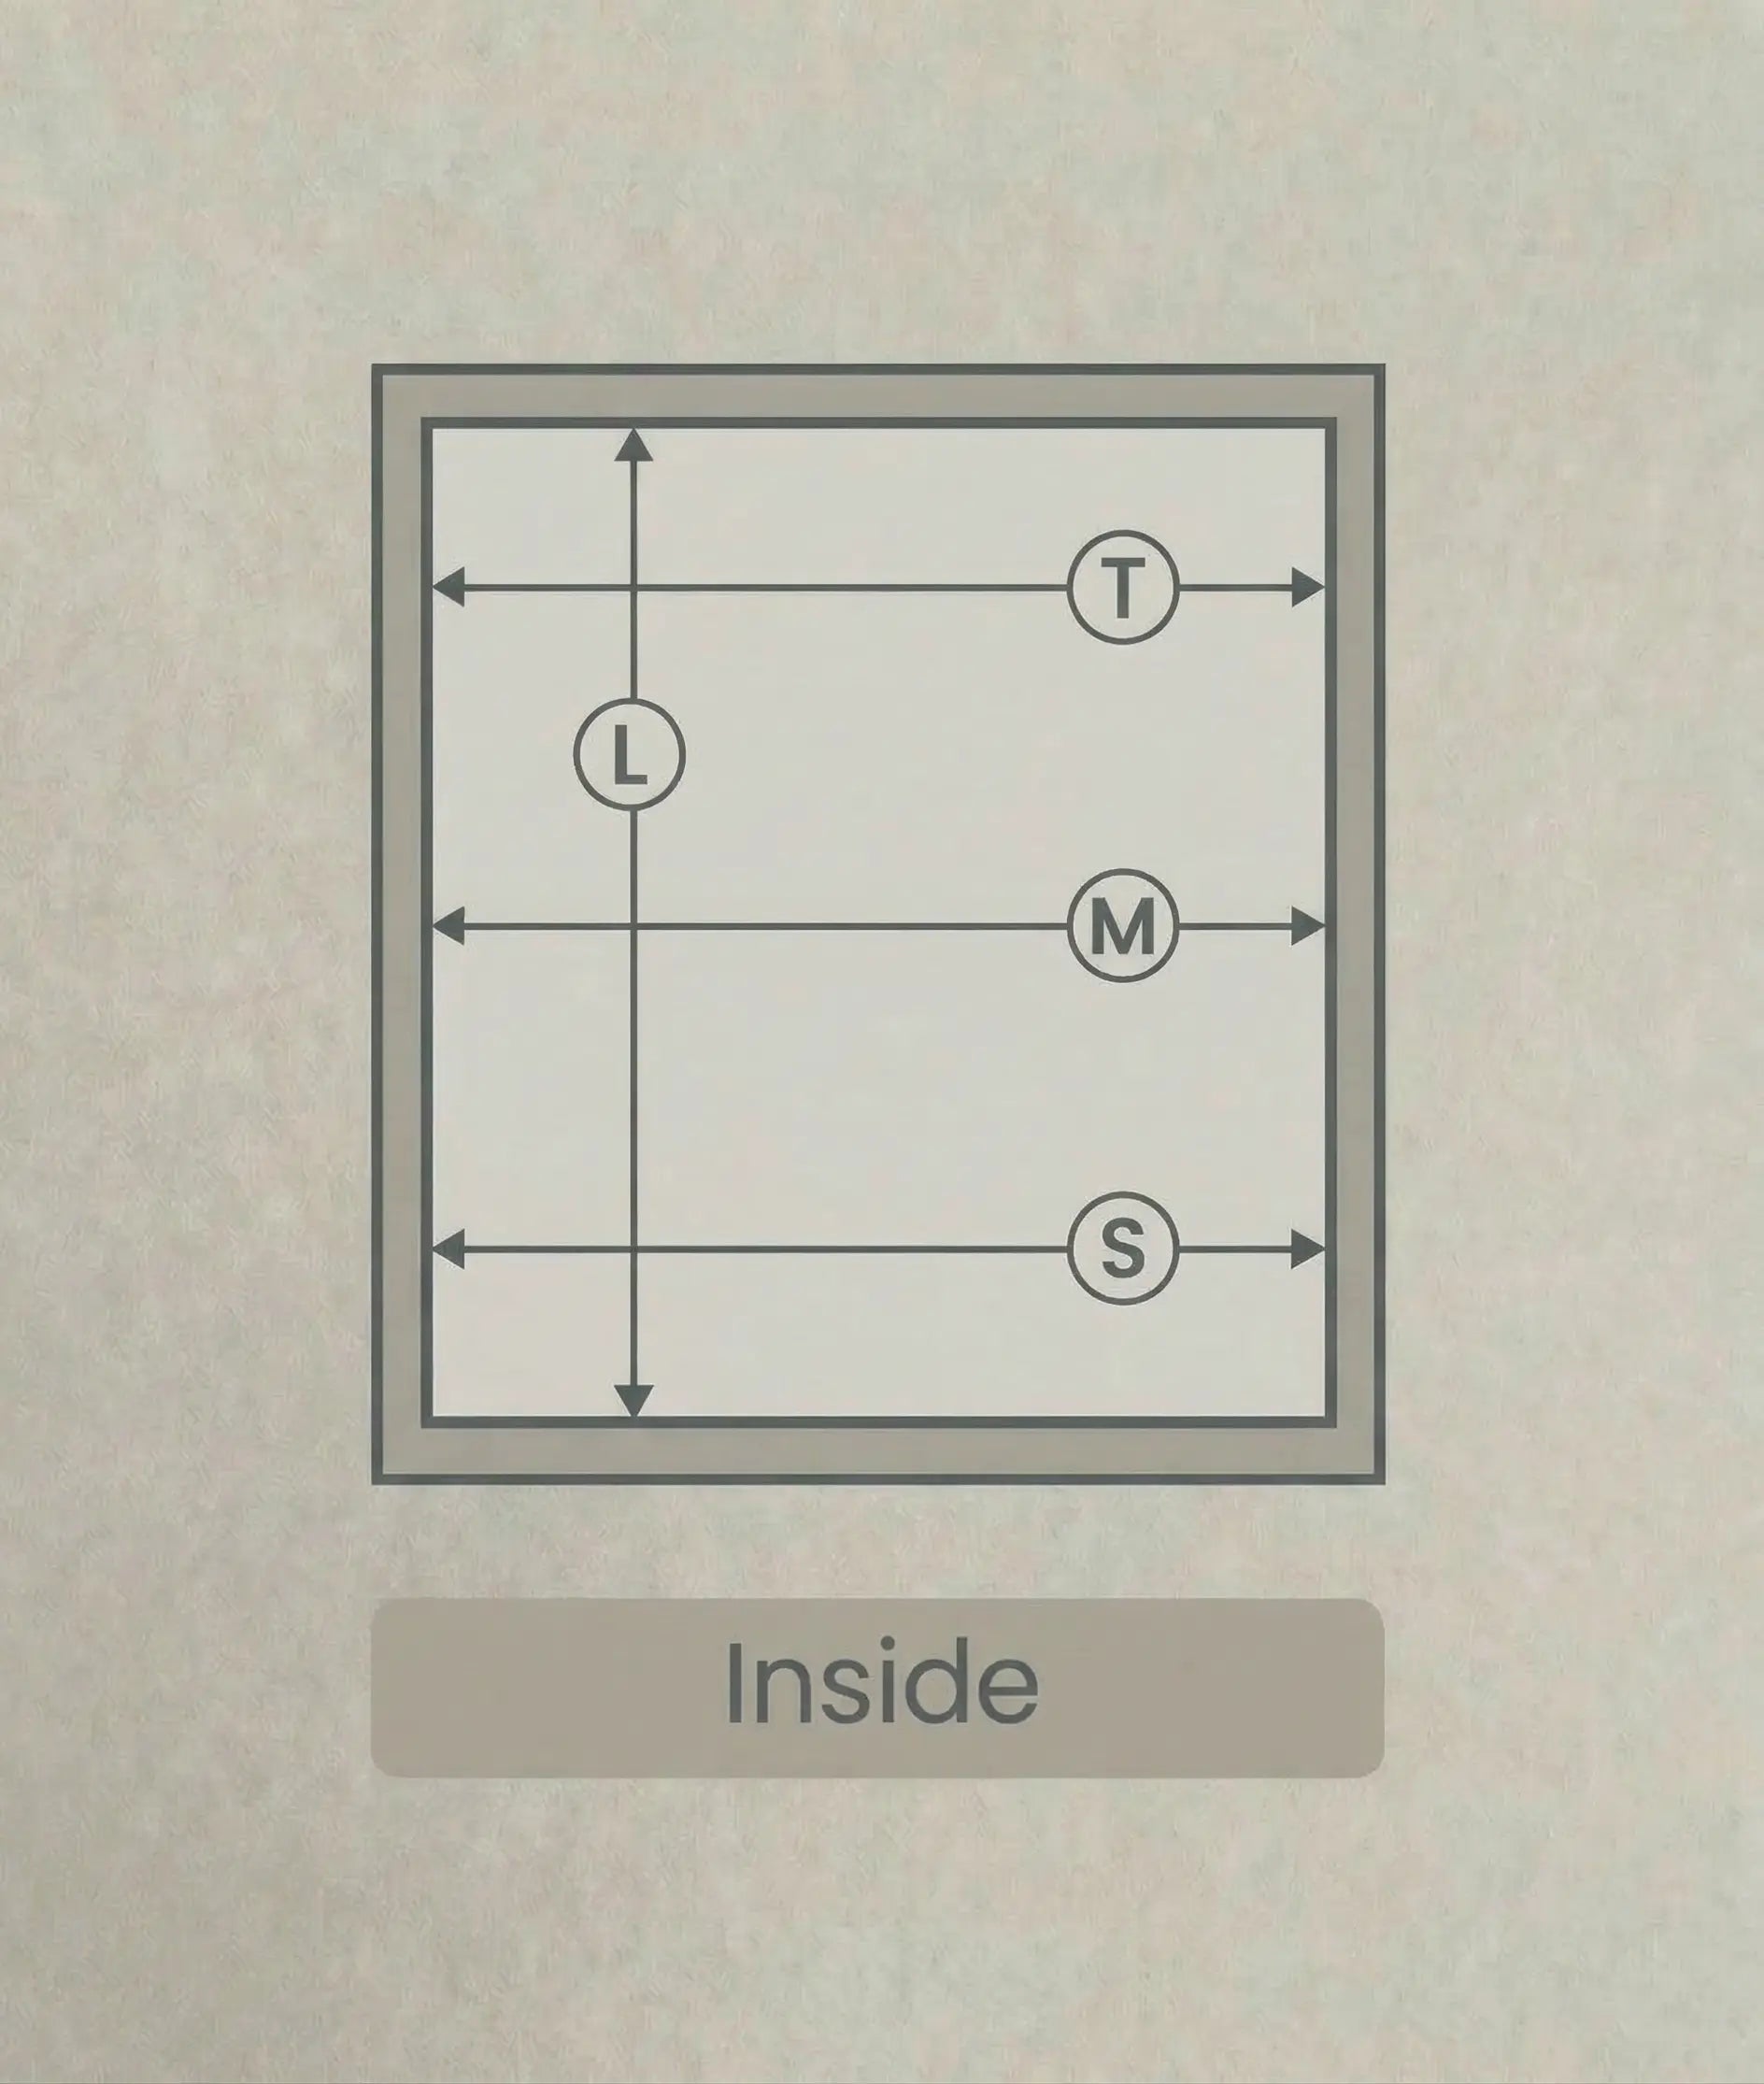
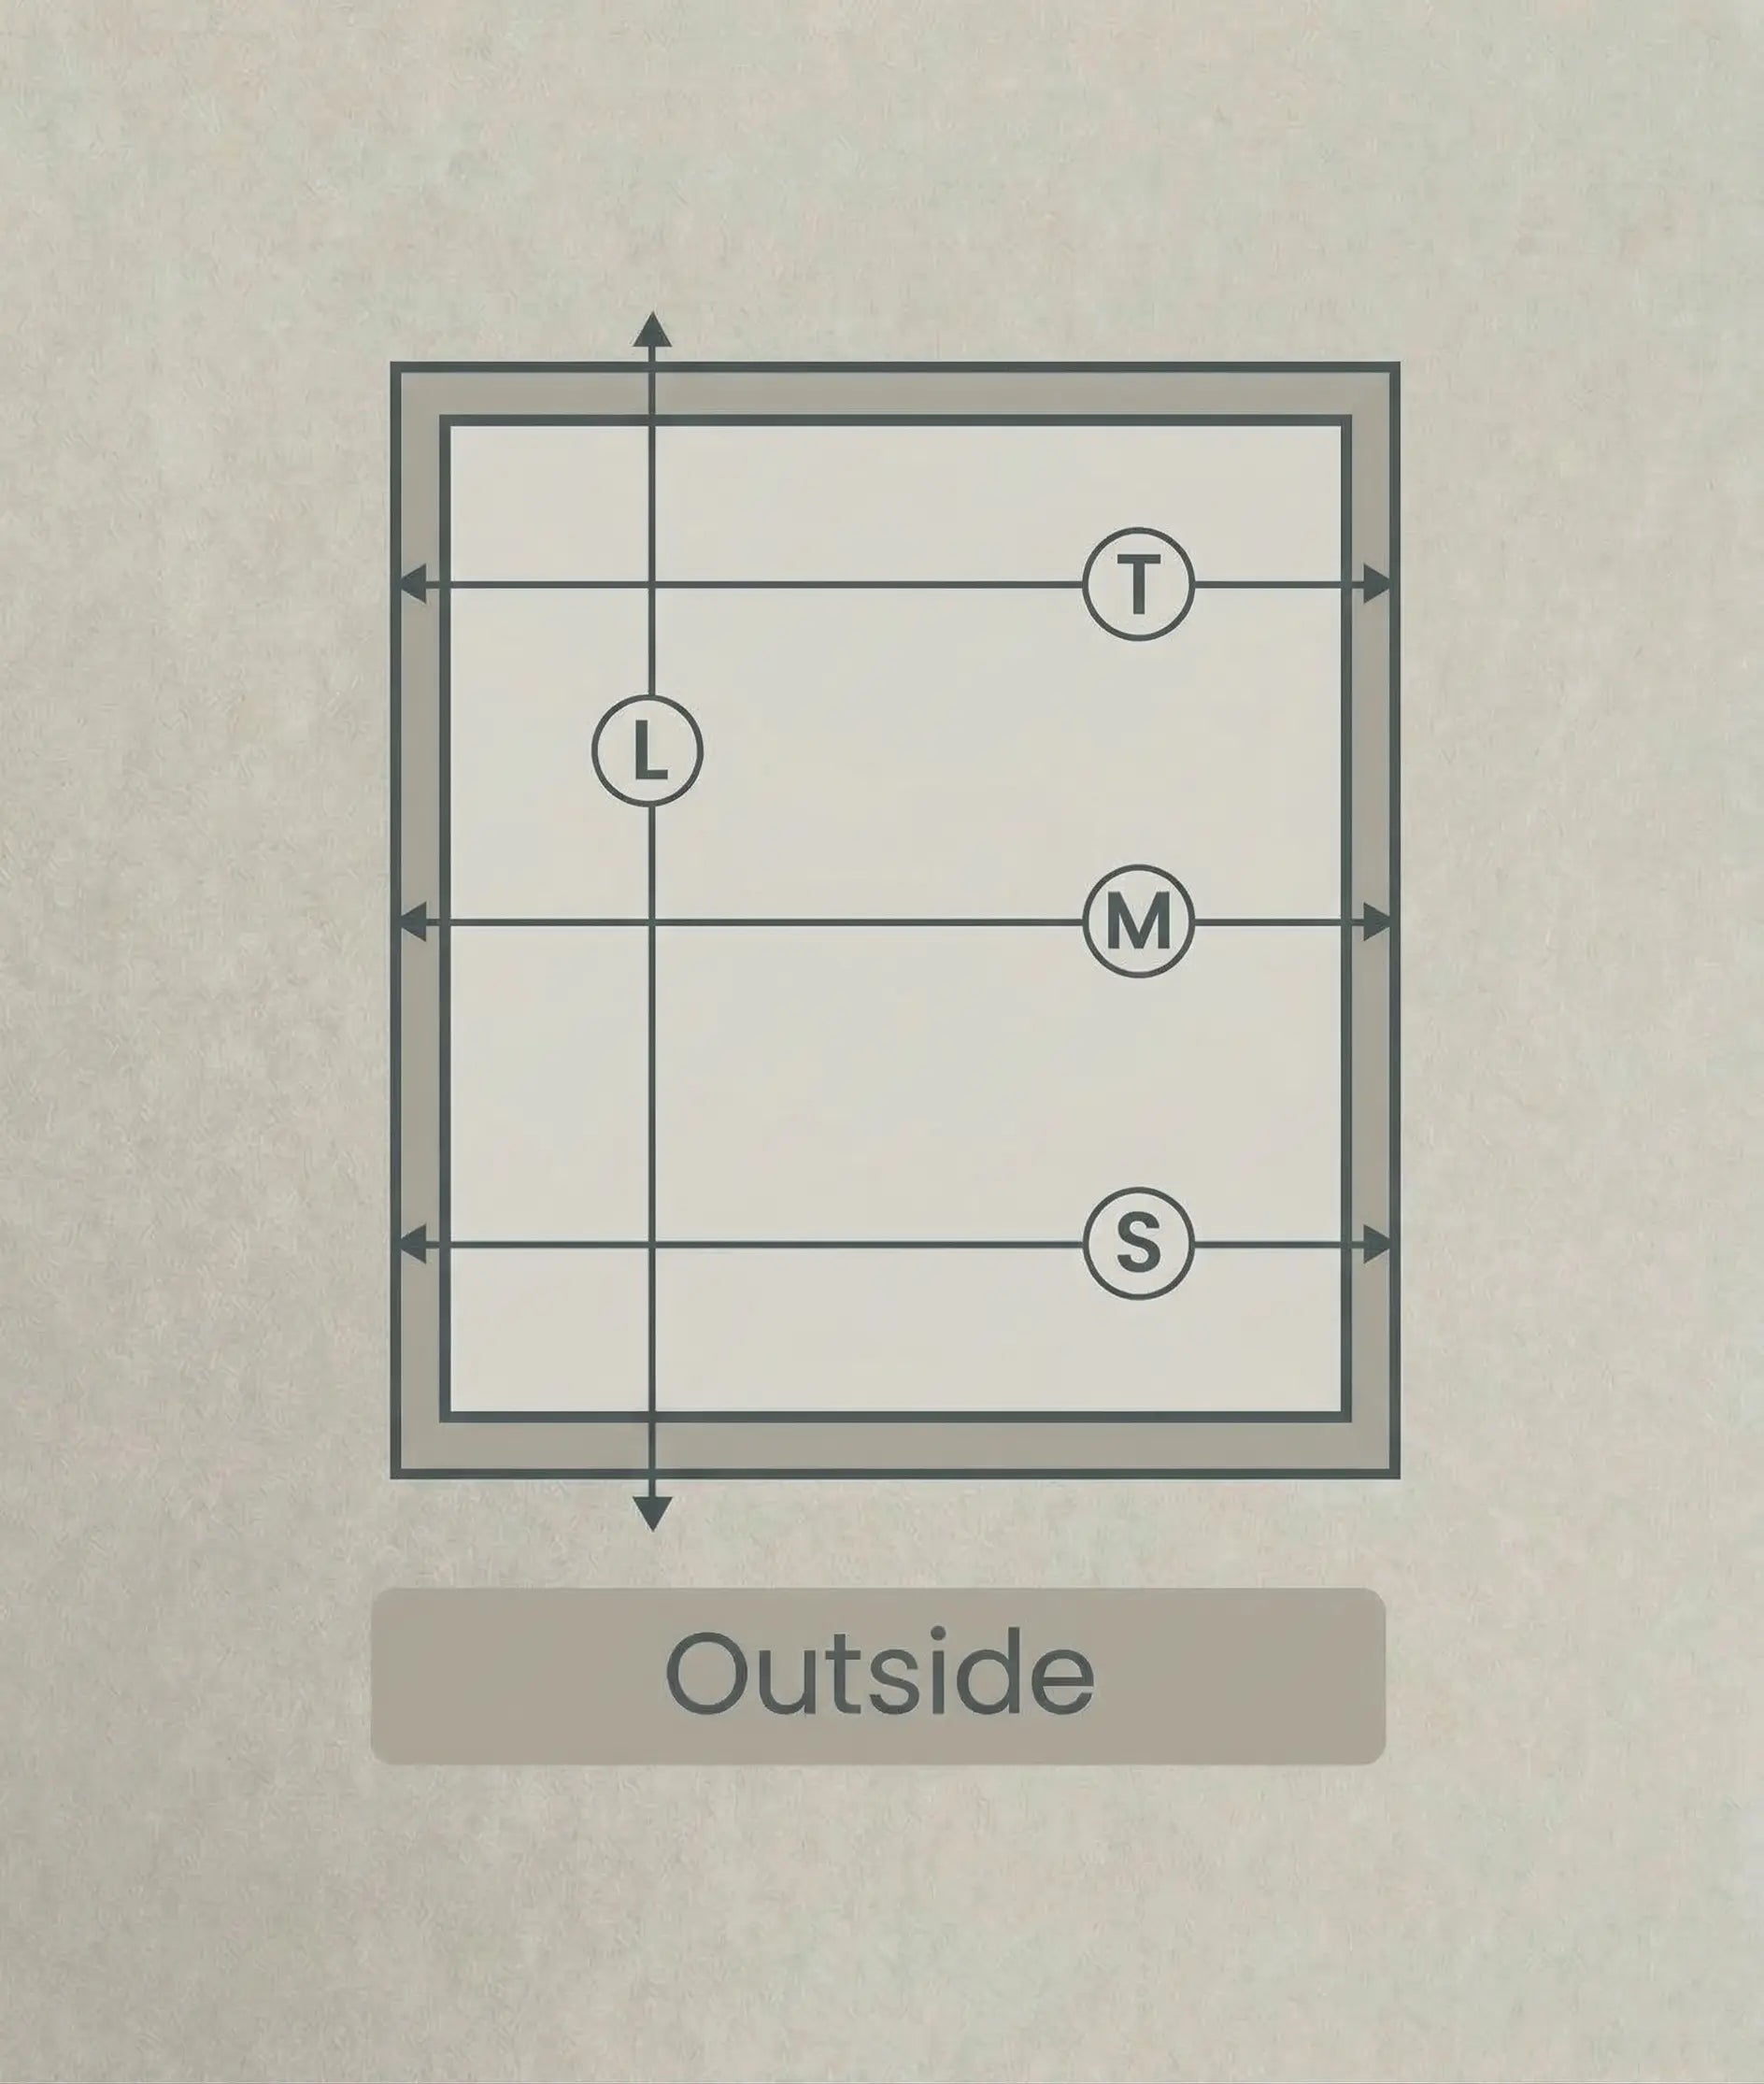
Measuring Roman Shades by Mount Type
Measuring for Inside Mount Shades
Width: Measure the inside width at the top, middle, and bottom. Record the narrowest measurement to the nearest 1/8 inch.
Height: Measure the inside height at the left, center, and right. Record the longest measurement to the nearest 1/8 inch unless the product page gives a different instruction.
Depth: Measure the usable depth at several points and use the shortest clear depth. Note handles, cranks, trim, tracks, and other obstructions.
Ordering note: Enter the opening measurements exactly as requested by the selected product. Do not make a deduction unless the product page specifically tells you to do so. Confirm the product's minimum depth, flush-mount depth, factory deduction, finished-size convention, and production tolerance before ordering.
Measuring for Outside Mount Shades
Width: Measure the total finished width you want the shade to cover. Allow enough overlap on both sides for privacy and light control, while checking trim, handles, adjacent walls, and bracket clearance. A common starting point is 1 1/2 to 3 inches of overlap per side, but the selected product specifications take priority.
Height: Measure from the planned top of the finished shade to the desired lower stopping point. Allow sufficient space above the opening for the headrail, brackets, and the raised shade. Do not add a fixed allowance until the mounting surface and product hardware have been confirmed.
Ordering note: Outside-mount shades are generally made to the ordered finished size unless the product page states otherwise. Confirm this before placing the order.
Measurement Checklist
- Use a steel tape measure.
- Measure each window separately, even if openings appear identical.
- Record raw measurements to the nearest 1/8 inch and do not round until you follow the product's ordering increment.
- Check that the mounting surface can support the product and that no obstruction interferes with operation.
- Review the product page for factory deductions, minimum and maximum sizes, mounting depth, hardware clearance, and production tolerances.
- Contact info@usdrapery.com before ordering if any specification is unclear.
How to Measure for Curtains?
Step 1:
Measure the Rod or Track
Existing Rod or Track
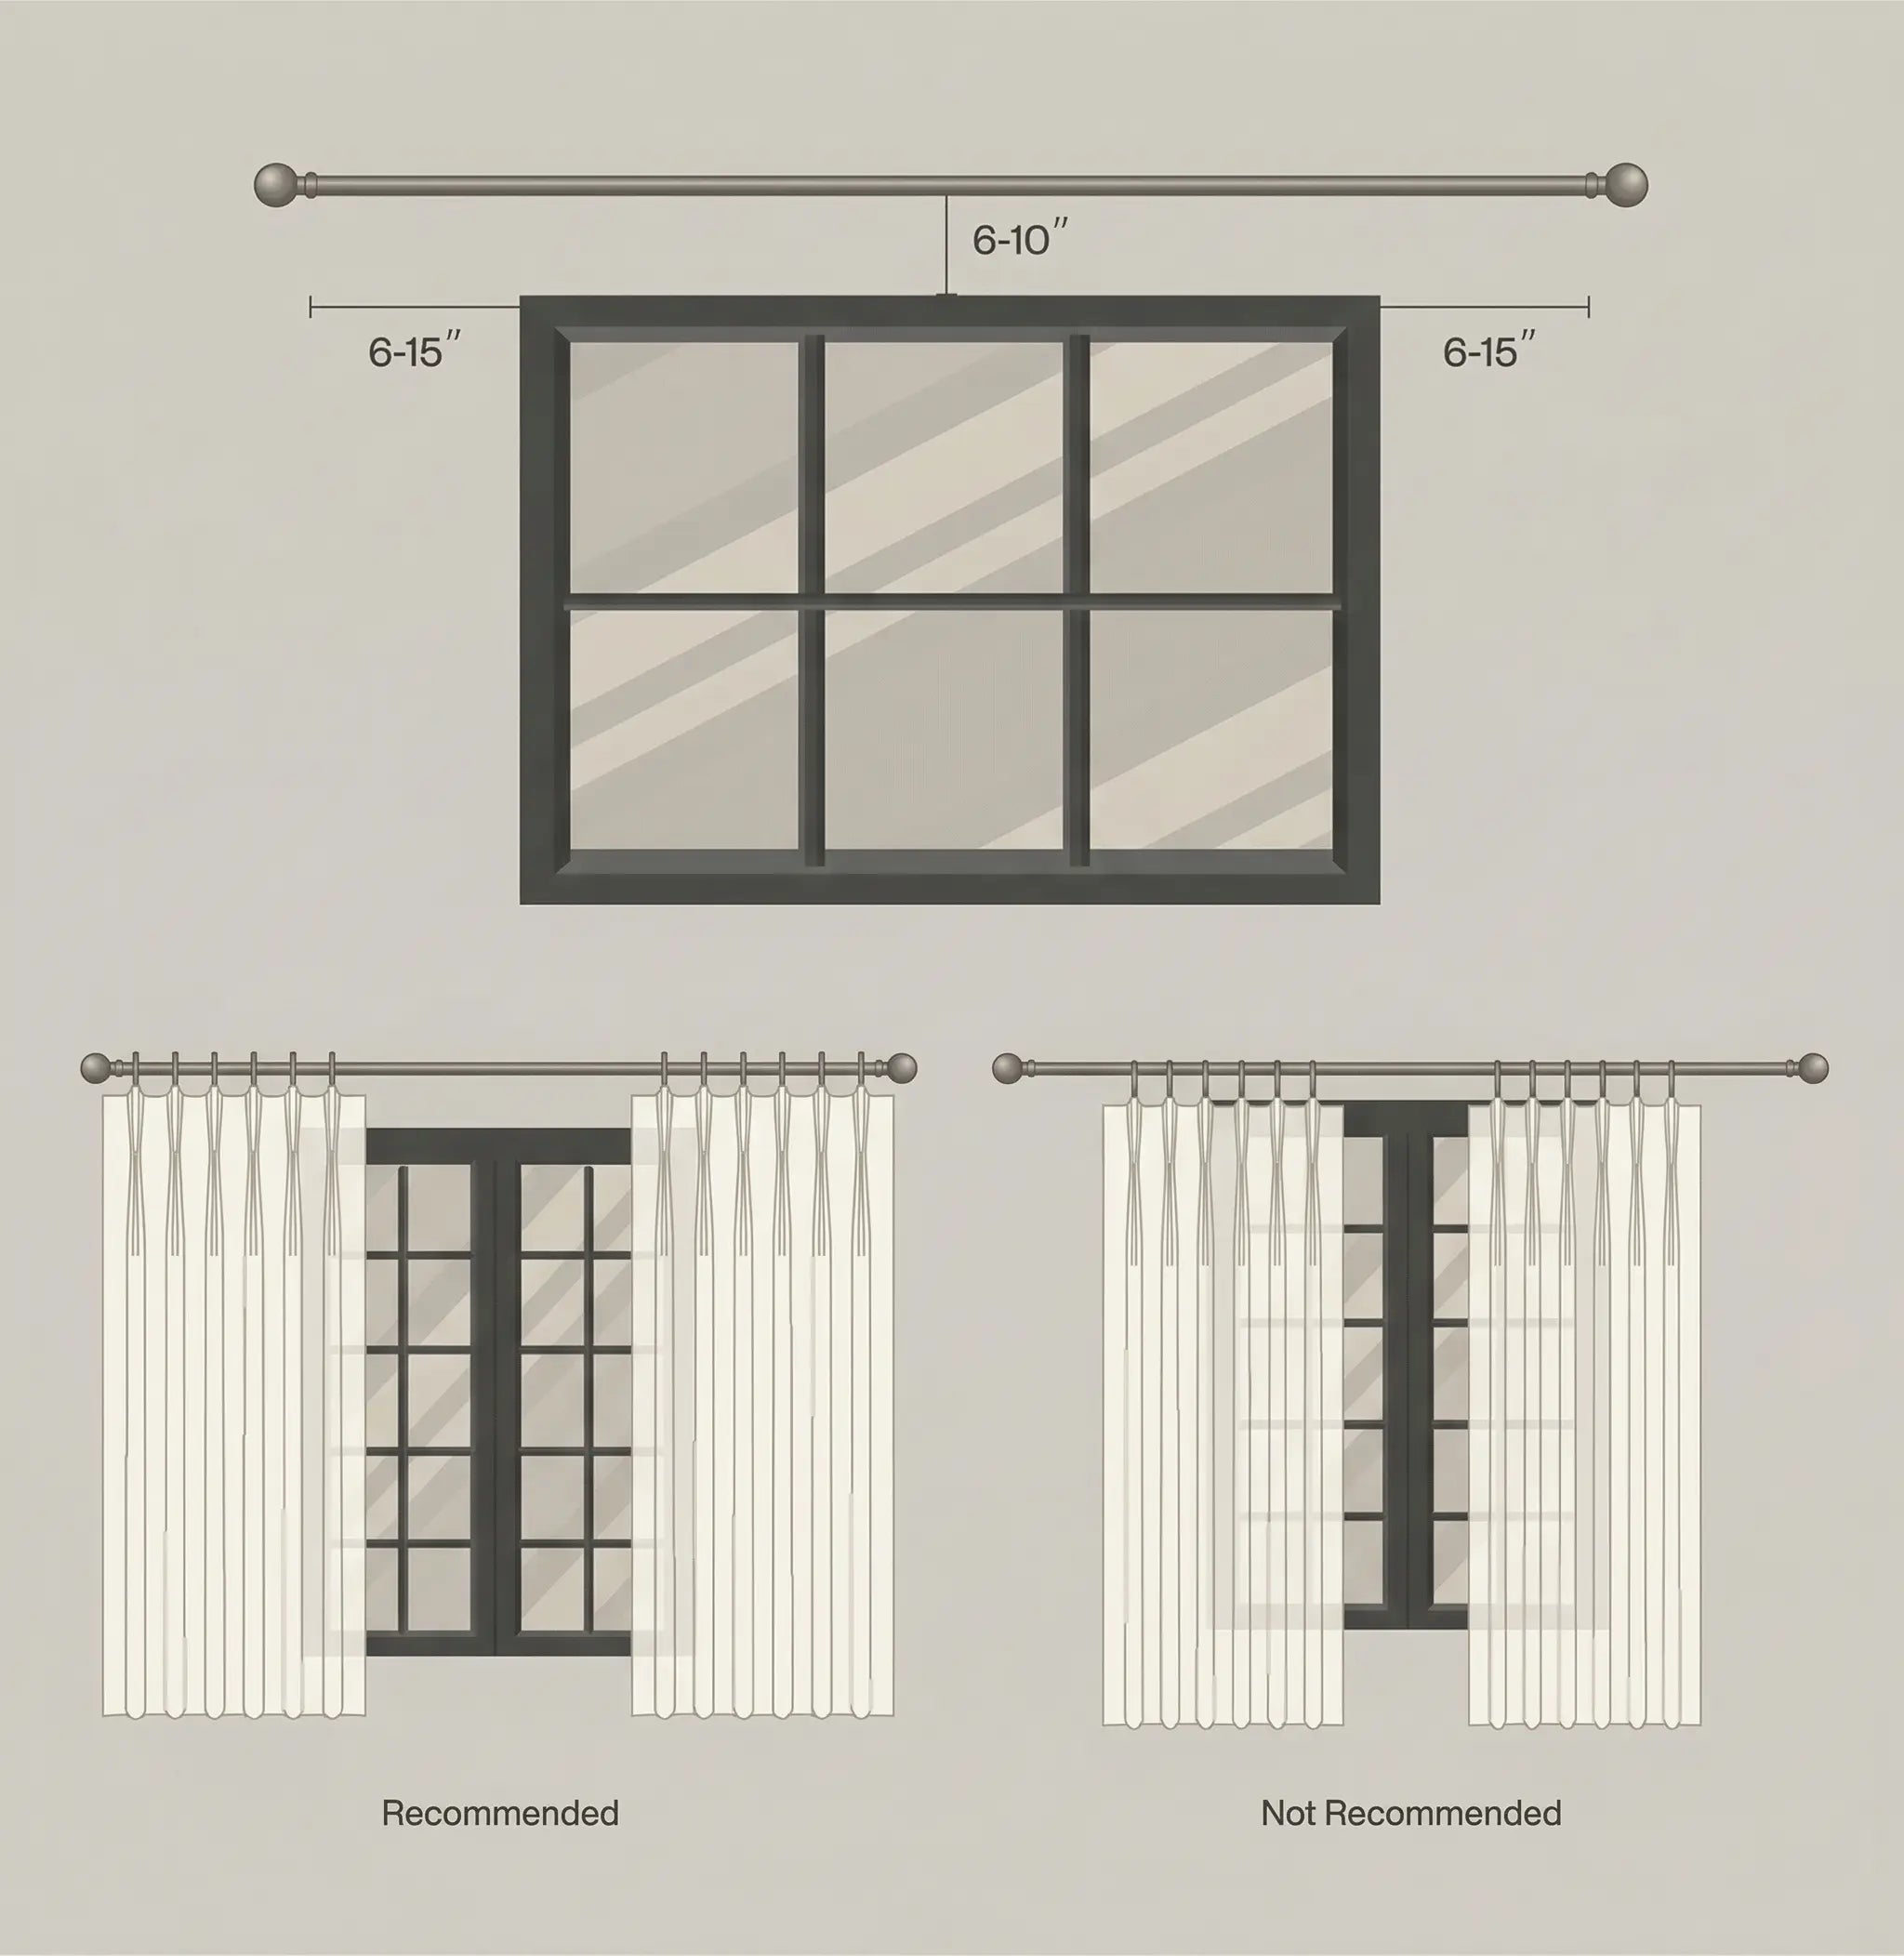
Measure the usable coverage width between finials, end stops, or return points—not the decorative overall length. Record the actual width the curtains need to cover.
New Installation
Choose the rod or track position after checking wall or ceiling support, bracket clearance, window trim, handles, furniture, and the space needed for the curtains to stack when open.
Design Guidance
Mounting above or beyond the window can change the visual proportions and increase coverage, but fixed allowances do not suit every room. Confirm the finished rod or track width and installation height before calculating panel size.
Understand Finished Width and Fullness
Fullness describes the relationship between fabric width and finished coverage width. It affects appearance and stacking, but it must be applied according to the selected header.
- Pleated headers: The product's ordered width is the finished top width when the pleats are sewn and fully extended. Required fabric fullness is built into the construction, so do not multiply the ordered width again.
- Flat headers: Grommet, rod-pocket, back-tab, tab-top, and flat-panel styles may require additional width to create gathers. Use the fullness range stated on the selected product page.
- Ripple-fold systems: Fullness is determined by the compatible track, carrier spacing, and snap tape. Use the system specification rather than a universal ratio.
Step 2:
Calculate the Curtain Panel Width
Flat Header Styles
Ordered panel width = usable rod or track width × selected fullness ÷ number of panels. Apply this formula only when the product page states that the ordered width represents flat fabric width.
Pleated Header Styles
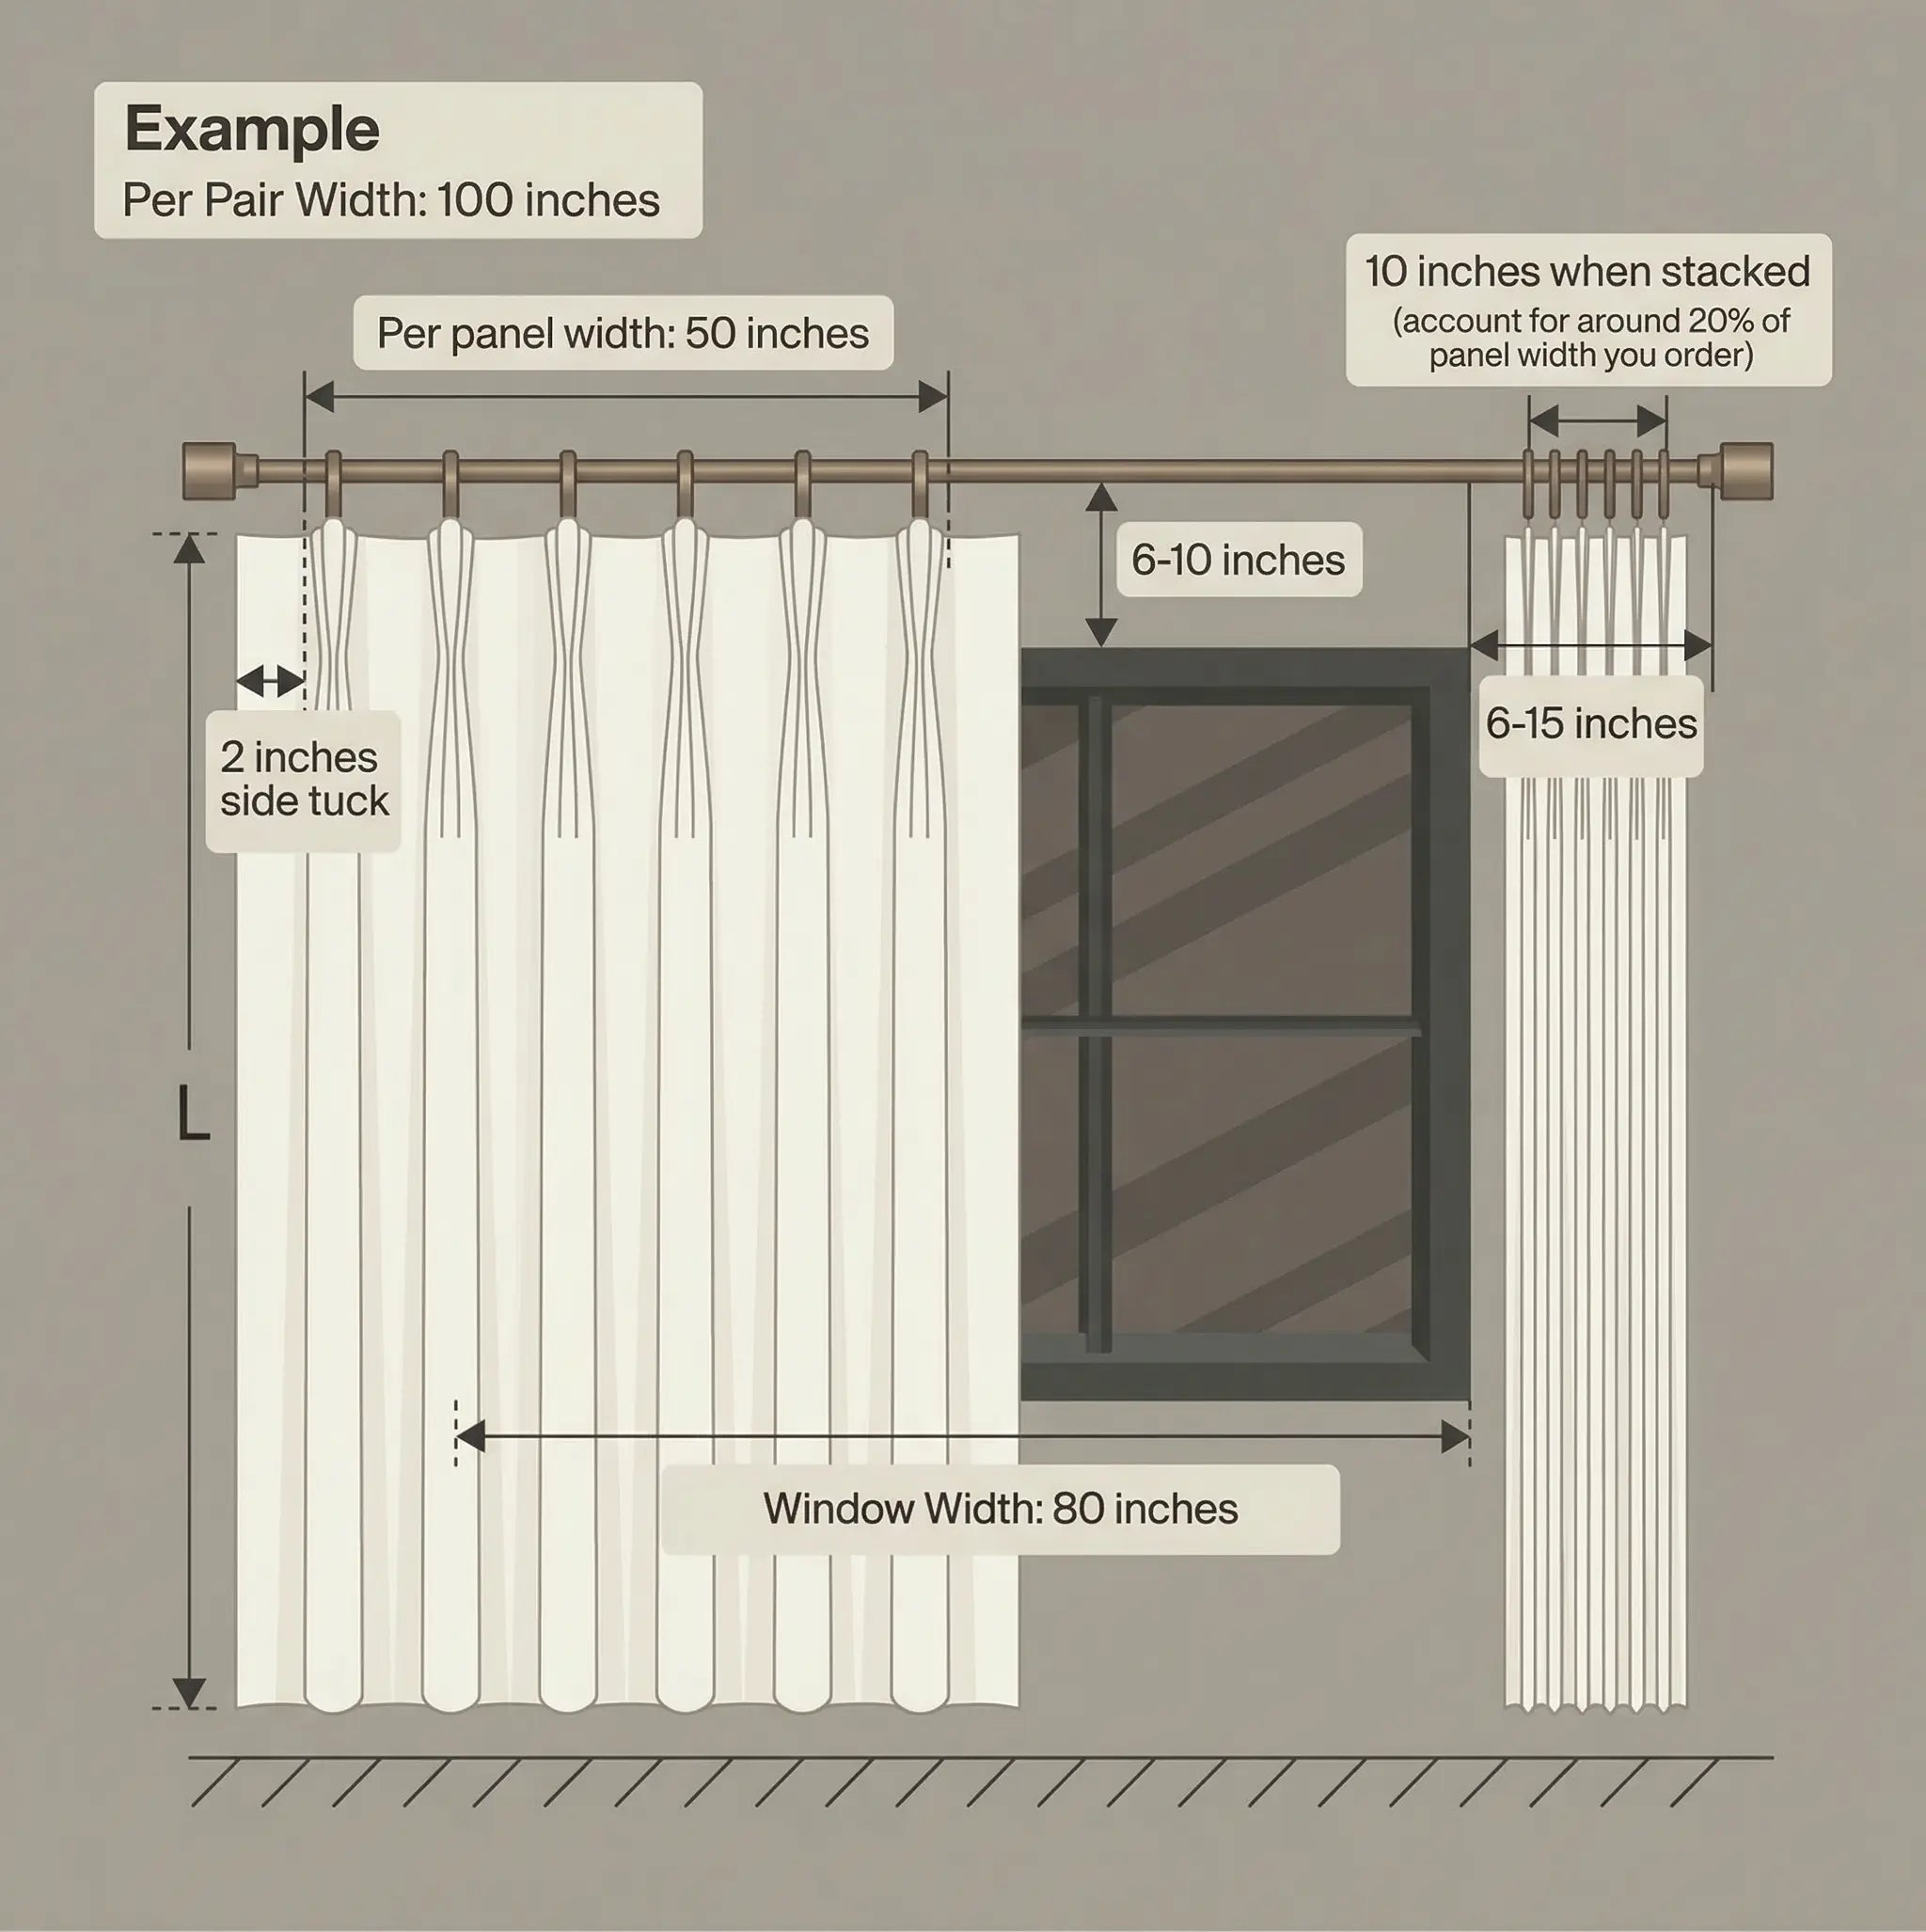
Ordered finished width per panel = usable rod or track coverage width ÷ number of panels. Do not multiply by pleat fullness again because the required fullness is built into the construction.
Ripple-Fold Systems
Determine ordered width using the specifications for the compatible track, carrier spacing, and snap tape. Do not assume the bottom width will always be a fixed multiple of the top width.
Example
For a 100-inch usable track with two pleated panels, a common starting point is 50 inches of finished top width per panel, subject to product instructions for overlap, returns, and track configuration.
Ordering Check
Keep the raw measurement and follow the product's available size increments and rounding instructions. Contact info@usdrapery.com before ordering if the required size falls between available options.
Step 3:
Calculate the Curtain Panel Length
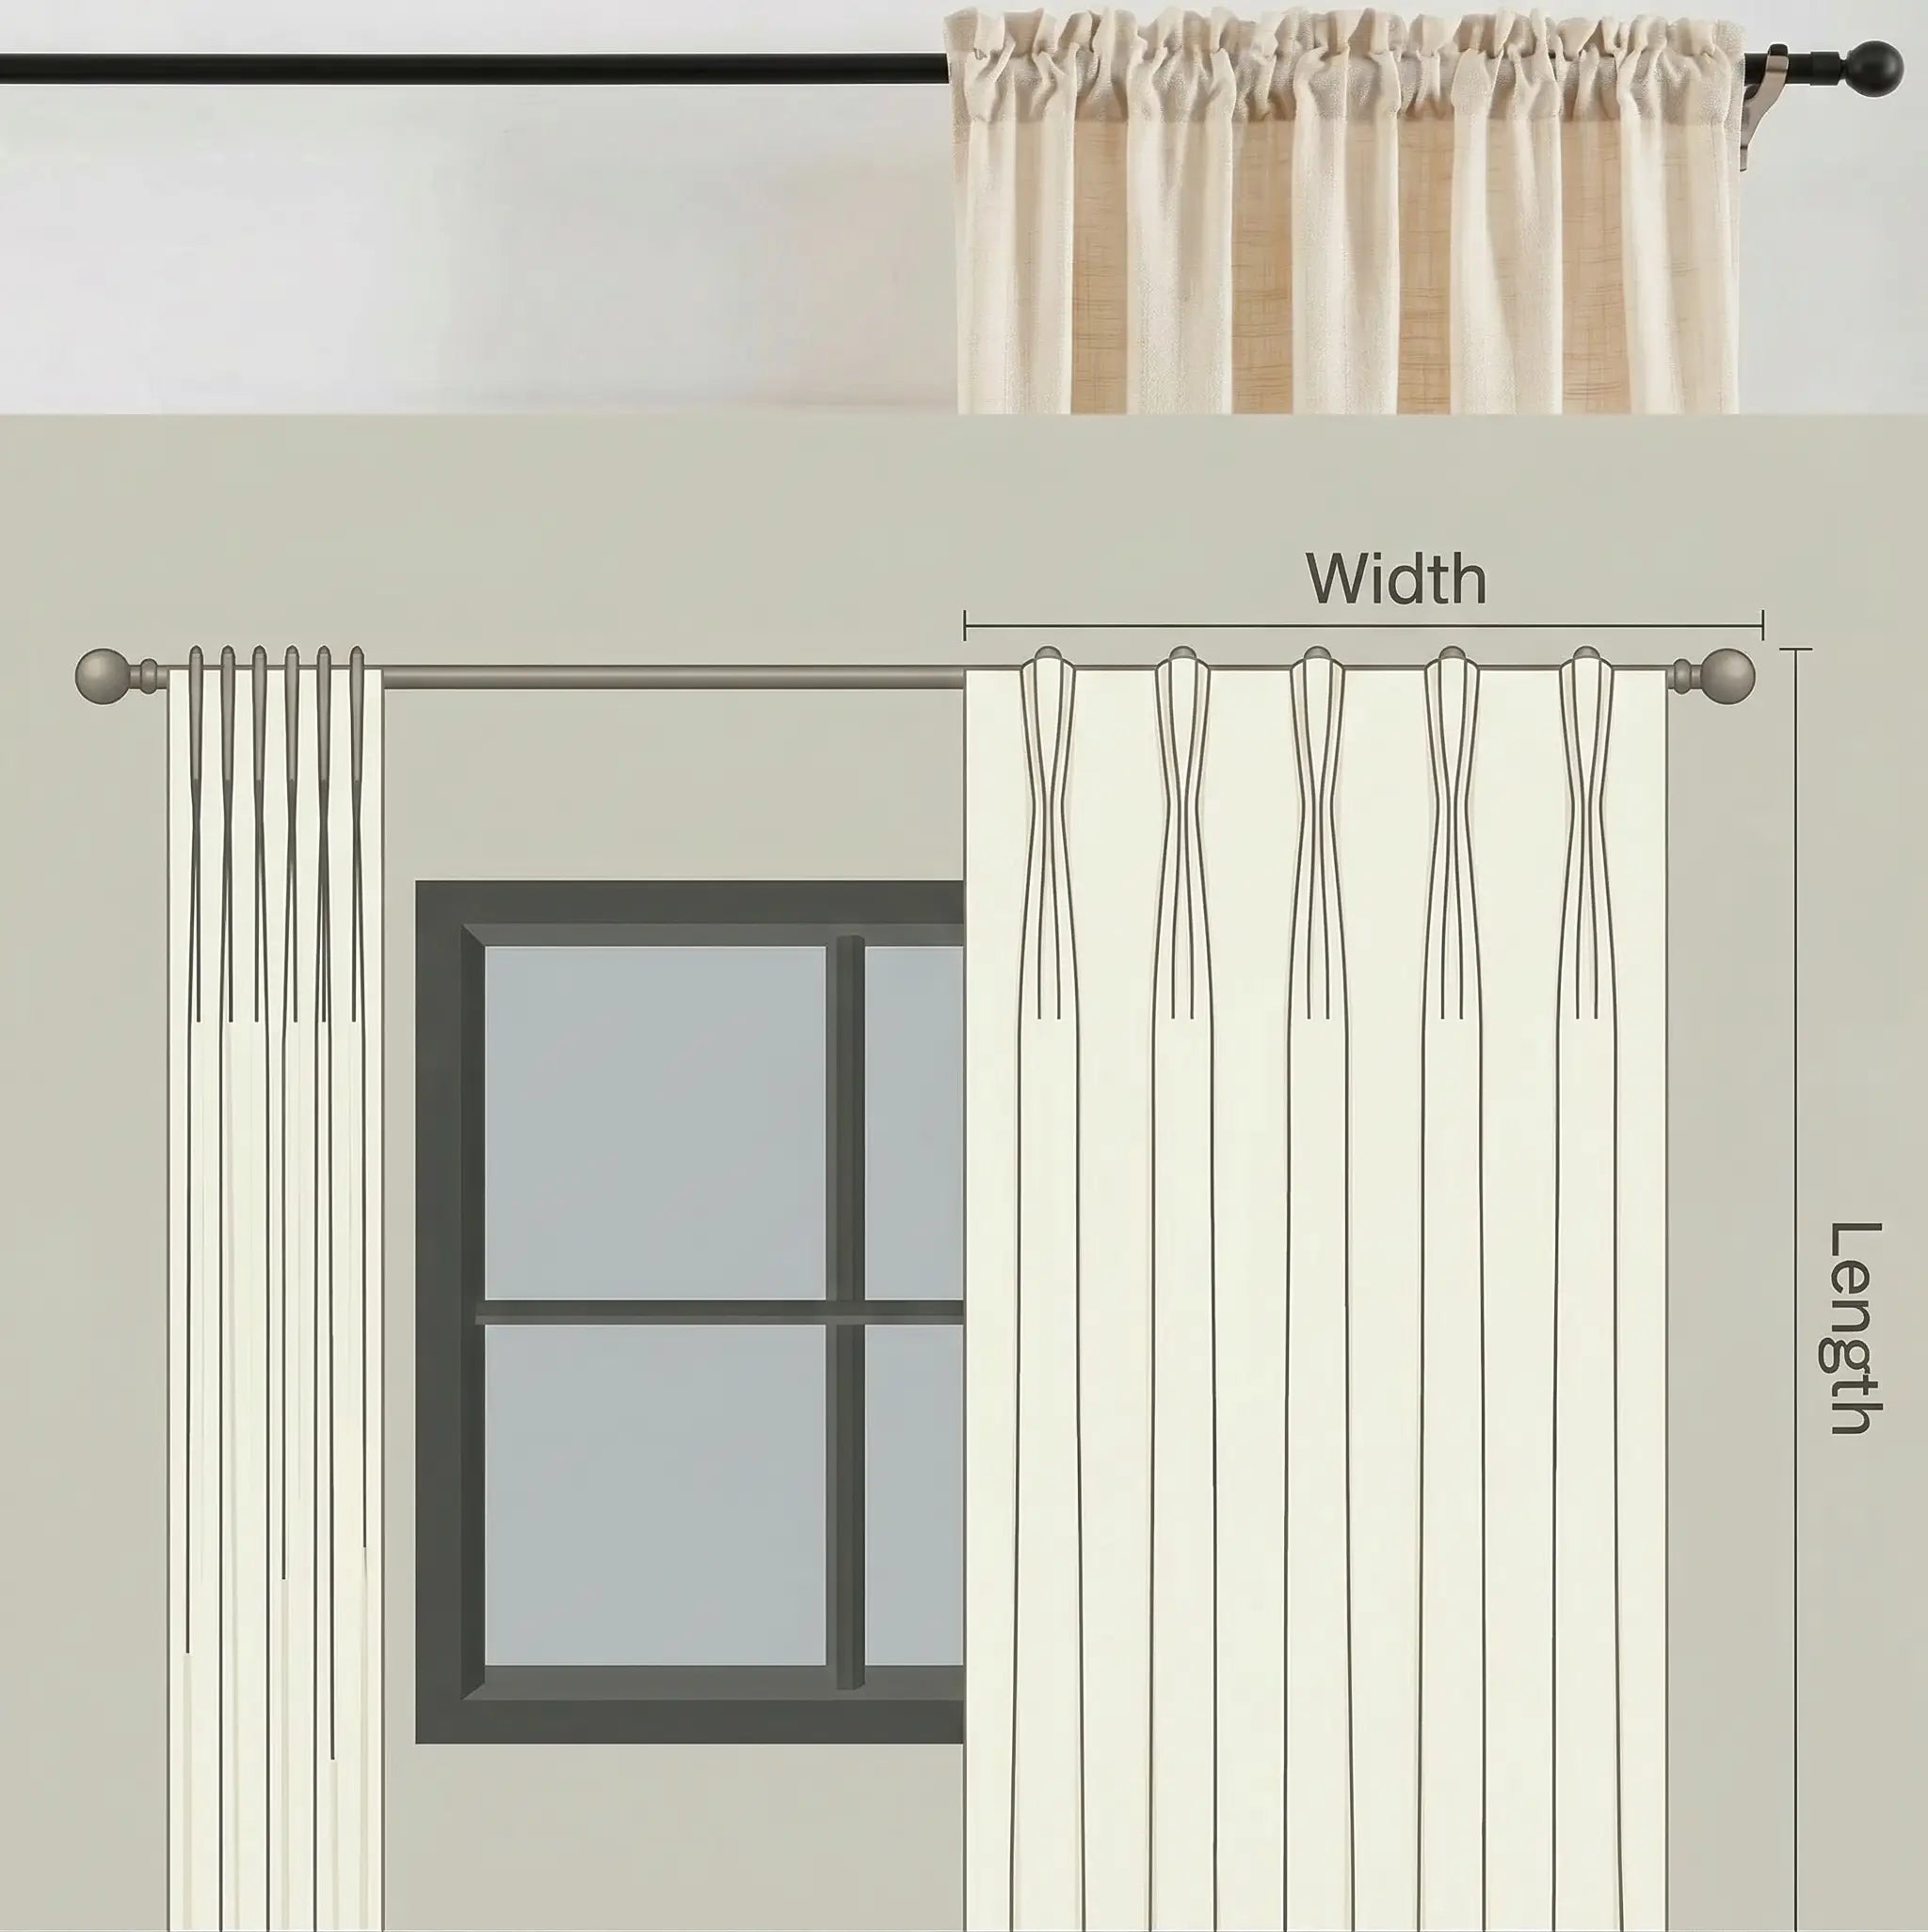
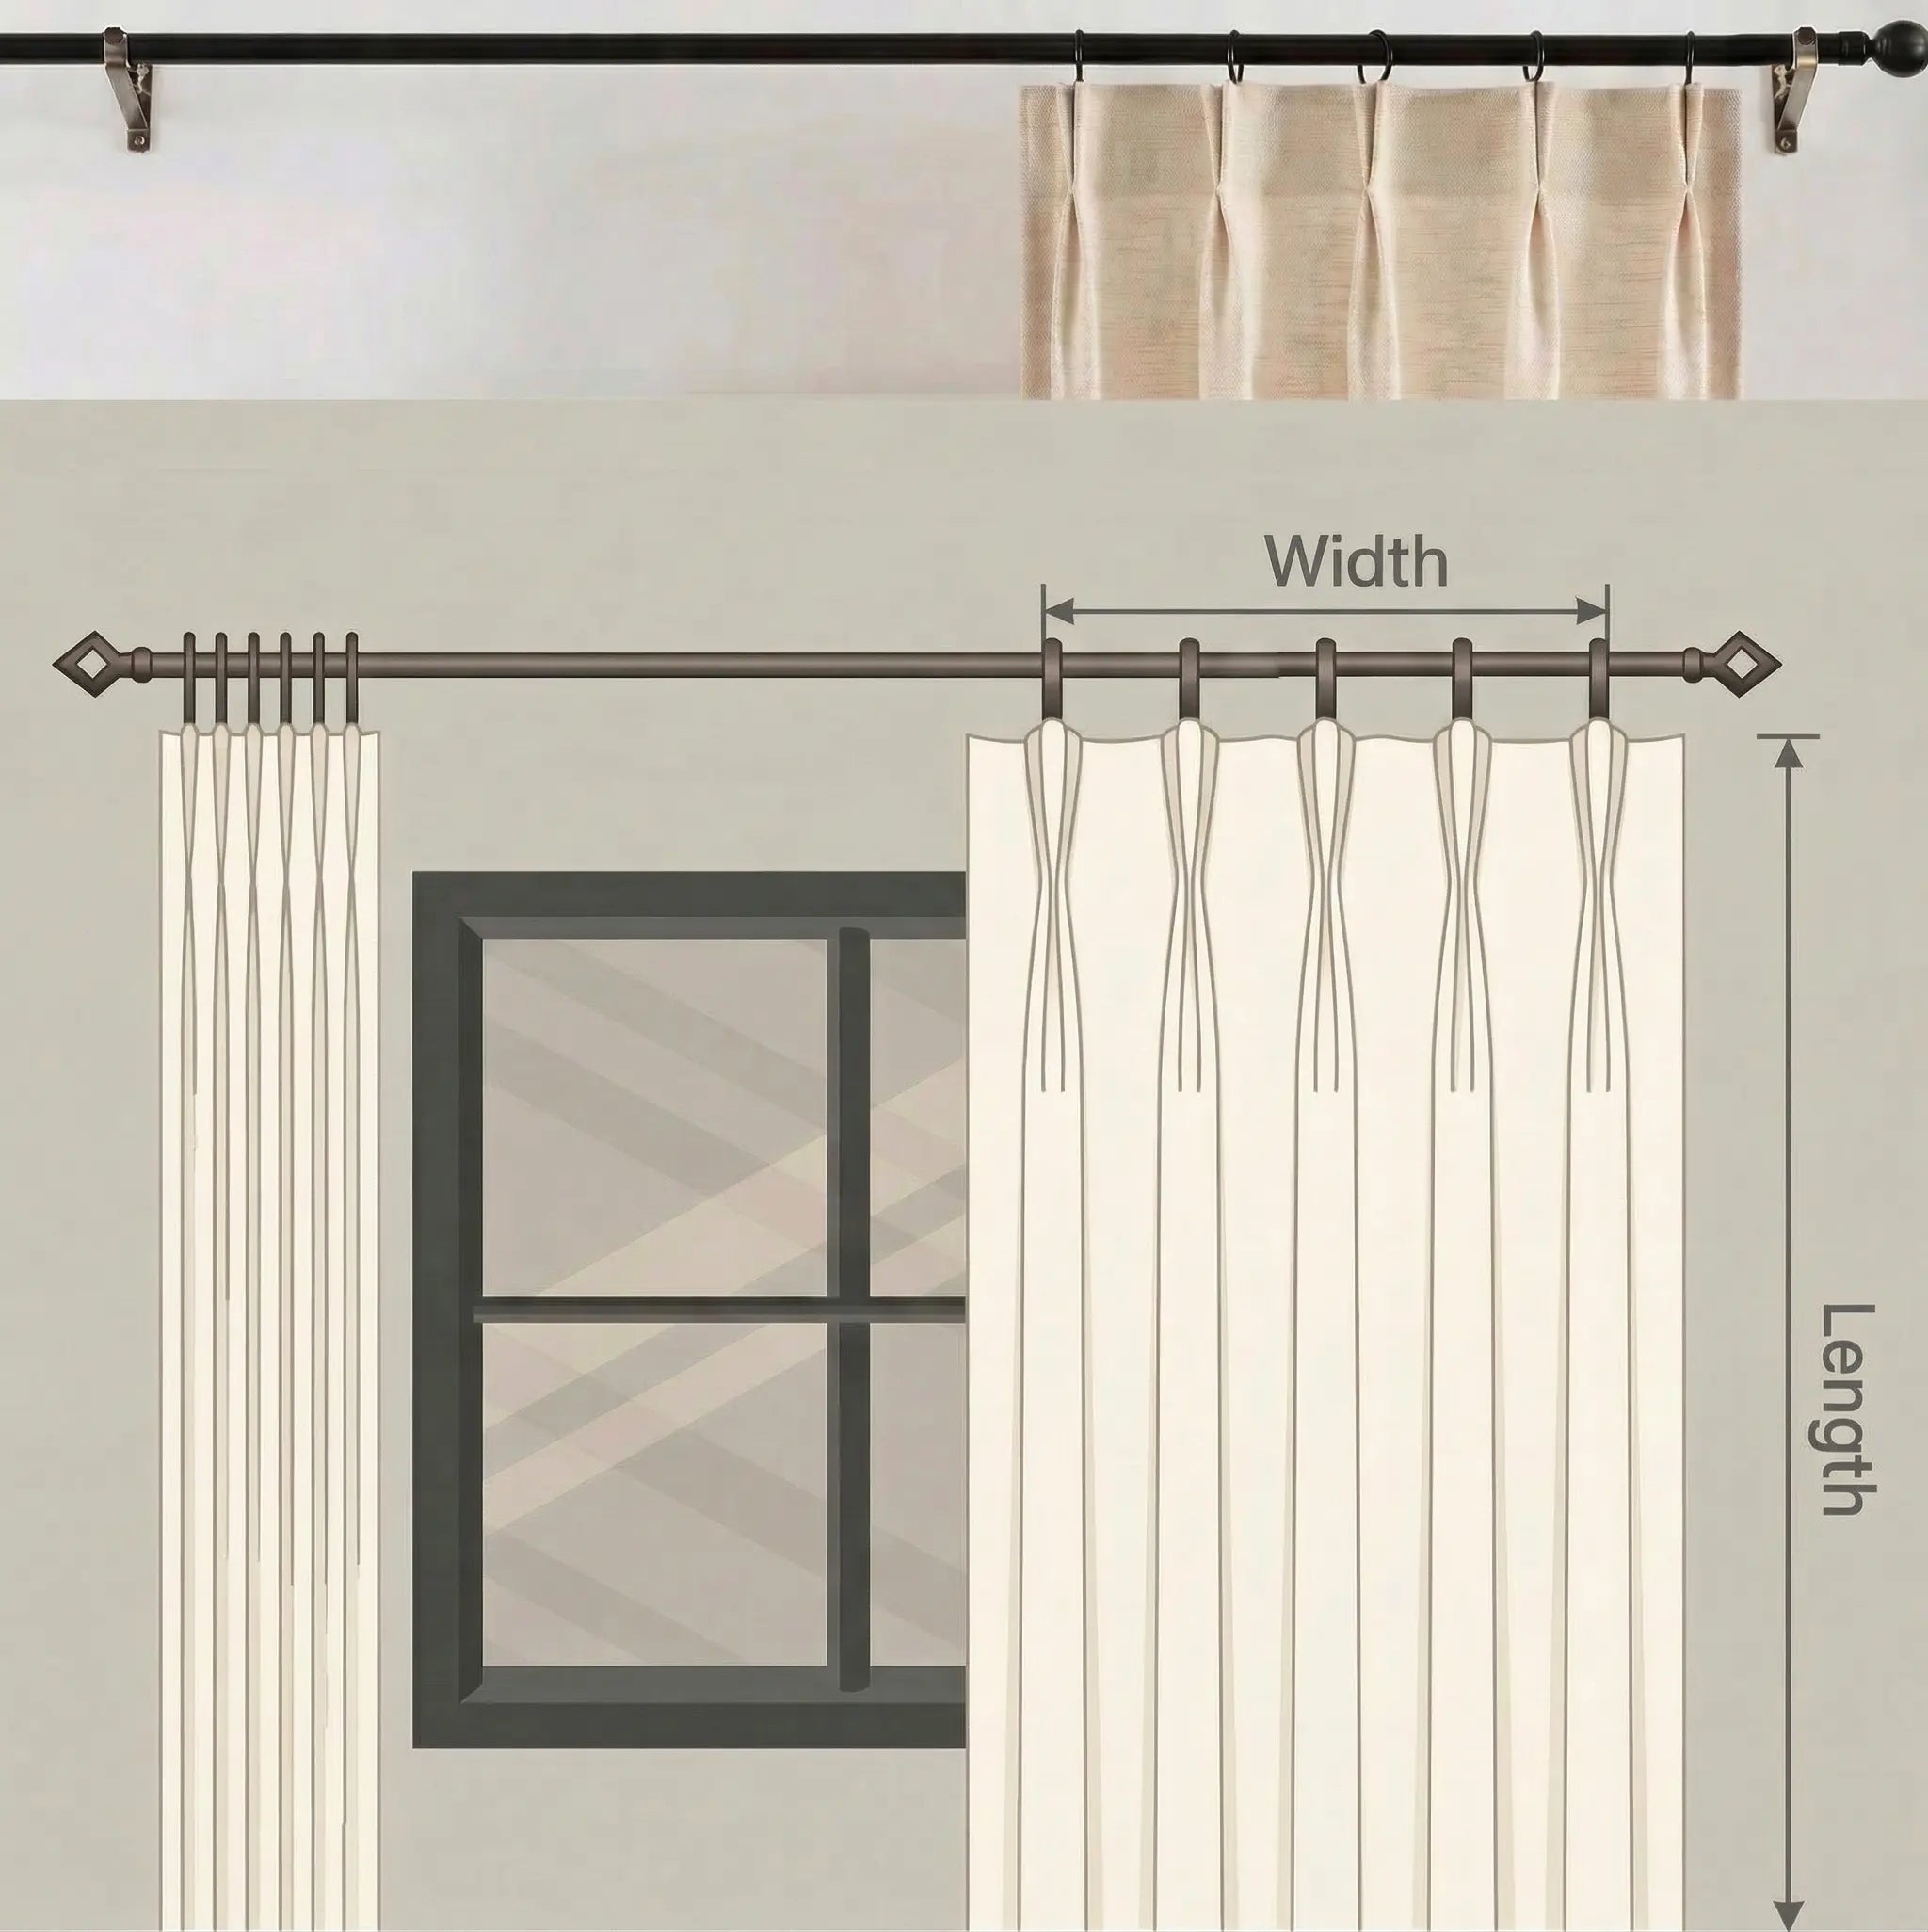
First install or finalize the intended rod or track position. Measure at the left, center, and right because floors and ceilings may not be level. The order field refers to overall finished panel length; the correct starting point depends on the selected header and hardware.
Flat Header Styles
Measure from the finished panel top required by the selected grommet, rod-pocket, back-tab, tab-top, or flat-panel construction to the desired hem position.
Pleated Header Styles
Measure from the ring eye, hook attachment point, or other product-defined reference point to the desired hem. Account for the distance between the attachment point and the finished panel top only when the product instructions require it.
Ripple-Fold Systems
Measure from the carrier connection point specified for the compatible track system to the desired hem. Allow for the system's connector or drop dimension rather than using a universal track-bottom formula.
Bottom Finish Options
- Floating: A common starting point is 1/2 to 1 inch above the floor.
- Kiss the Floor: Aim for the panel to meet the floor lightly. Use the shortest of the left, center, and right measurements to reduce dragging on an uneven floor.
- Puddling: Add approximately 2 to 4 inches when deliberate fabric pooling is desired and appropriate for the fabric and room use.
These are appearance guidelines, not universal production allowances. Confirm the selected product's ordering increments and measurement reference point before choosing the final length.
Final Measurement and Ordering Check
- Use a steel tape measure and record each dimension carefully.
- Measure every window or doorway separately, even when openings appear identical.
- Keep raw measurements to the nearest 1/8 inch. If a curtain selector accepts only whole-inch values, follow the product's rounding instructions or contact us before choosing a size.
- For pleated products, order the finished width requested by the product field; do not add pleat fullness a second time.
- Confirm the header style, rod or track, number of panels, overlap or returns, measurement starting point, and desired floor finish.
- Review all selected widths, lengths, fractions, mount types, and operating options before submitting the order.
This guide provides general recommendations and does not replace the specifications for the selected product or hardware. For complex windows or unclear measurements, contact info@usdrapery.com before ordering.